• Home
  • About
  • PR/Contact
  • Disclosure
  • Reviews
  • Sign Up
  • Shop My Stash

All Things Beautiful XO

Stephanie Louise Telford & her guide on beauty, style, & glitter!

Requested: Forehead Braid

July 30, 2013 By StephanieLouise 357Leave a Commenthttps%3A%2F%2Fwww.allthingsbeautifulxo.com%2F2013%2F07%2Frequested-forehead-braid.htmlRequested%3A+Forehead+Braid2013-07-30+12%3A59%3A00StephanieLouisehttp%3A%2F%2Fwww.allthingsbeautifulxo.com%2F2013%2F07%2Frequested-forehead-braid.html

 photo RequestedForeheadBraid05_zpsed7c1c4b.jpg

So awhile back I got what stuck me as a strange request. Sometimes you guys tweet me, facebook, or email me requests/questions. Normally I totally know what to say but this problem threw me for a loop.

“hi I love your blog and had a question. I’m going back to school soon and grew out my bangs. I feel like my forehead looks bigger and was wondering if you had a hairstyle that didn’t pull my hair tight. Thanks!” – Tammi

 photo RequestedForeheadBraid02_zps209506c0.jpg

 photo RequestedForeheadBraid01_zpsbef5efa7.jpg

Personally, I don’t worry about my forehead much. I had bangs as a kid & totally hated them. Too much work when I just want to throw my hair up too! I think in 10 years when I start really noticing my wrinkles I’ll probably try them out but for now, no thanks. However, my mom has always had bangs. I decided to do something that brings the hair forward instead of pulling it taunt. What do you think?

 photo RequestedForeheadBraid03_zps5fea6926.jpg

This is a basic braid that I started behind my ear & pulled hair to the front somewhat loosely. I came upon this by sheer accident so sorry my part isn’t straight! I really tried! I teased my hair a bit to make the difference look more dramatic. I thought it looked nicer & I got several compliments from strangers which is always nice.

Does anyone else have ideas to help Tammi? I’d love to see/hear them! I know how important a good hair day can be!

Filed Under: Hair, Tutorials & Looks

Glamour Doll Eyes Oddity, Downtown, & Flawless Eyeshadow Look

June 21, 2013 By StephanieLouise 389Leave a Commenthttps%3A%2F%2Fwww.allthingsbeautifulxo.com%2F2013%2F06%2Fglamour-doll-eyes-oddity-downtown.htmlGlamour+Doll+Eyes+Oddity%2C+Downtown%2C+%26+Flawless+Eyeshadow+Look2013-06-21+21%3A16%3A00StephanieLouisehttp%3A%2F%2Fwww.allthingsbeautifulxo.com%2F2013%2F06%2Fglamour-doll-eyes-oddity-downtown-flawless-eyeshadow-look.html

 photo GlamourDollEyesOddityFlawlessampDowtownEyeshadowLook07_zps01e801fe.jpg

PR Sample. Affiliate links.

Hopefully you caught my review of my first Glamour Doll Eyes eyeshadows awhile back & felt my excitement through my words. The shades…oh man they are pretty perfect. I’ve been waiting to do an eyeshadow look for awhile now so I’m really excited to share this with you today! I went simple & used three of my Glamour Doll Eyes shadows in Oddity, Flawless, & Downtown. Keep reading to check it out!

 photo GlamourDollEyesOddityFlawlessampDowtownEyeshadowLook08_zps9a369fe9.jpg

 photo GlamourDollEyesOddityFlawlessampDowtownEyeshadowLook04_zpsfc8185ac.jpg

I used the Urban Decay Eyeshadow Primer in Eden for some color correction. Green base shade is Glamour Doll Eyes Oddity from the Circus Collection. I love this shade & it is so wonderfully pigmented. In my crease is Downtown which is possibly one of my favorite shades from any brand ever. Taupe-y brown with aqua glitter? Win. Flawless is my highlight shade. I then topped this look off with eyeliner & mascara.

 photo GlamourDollEyesOddityFlawlessampDowtownEyeshadowLook09_zpsfd511e69.jpg

I think this turned out so cool & I really enjoyed wearing it today! If you want to see it in action, check out my weekly favorites video that I posted today wearing this look! You can see the glitter coming through in Downtown.

What do you think? Is this a combo you’d wear or are you more subdued? I have gotten requests for more “wearable daytime” type looks & I promise I’ll have some coming up! Do you have any shades from Glamour Doll Eyes?

Filed Under: Eyes, Tutorials & Looks

Nail Art: Summer Splatter Nails + My First Video Tutorial!

June 20, 2013 By StephanieLouise 391Leave a Commenthttps%3A%2F%2Fwww.allthingsbeautifulxo.com%2F2013%2F06%2Fnail-art-summer-splatter-nails-my-first.htmlNail+Art%3A+Summer+Splatter+Nails+%2B+My+First+Video+Tutorial%212013-06-20+22%3A01%3A00StephanieLouisehttp%3A%2F%2Fwww.allthingsbeautifulxo.com%2F2013%2F06%2Fnail-art-summer-splatter-nails-my-first-video-tutorial.html

 photo SummerSplatterTutorialNailArtSummer01_zps3c72e698.jpg

After quite a few requests on various accounts…I finally made a nail tutorial on youtube! I’ve actually made like 3…though you’ll never see those because they were terrible.All of the directions are in the video along with some basic information & how I prep. I really loved this manicure a lot & so did hubby! & random people on the street…Keep reading to see how to get this look yourself!

 photo SummerSplatterTutorialNailArtSummer04_zps492122e8.jpg

 photo SummerSplatterTutorialNailArtSummer08_zps6e832bd0.jpg
Pink- Orly in Passion Fruit

 photo SummerSplatterTutorialNailArtSummer05_zps2dfd7beb.jpg

Orange- Jesse’s Girl in Crush

 photo SummerSplatterTutorialNailArtSummer09_zpse3355353.jpg

Yellow- Orly in Glowstick

 photo SummerSplatterTutorialNailArtSummer06_zpscd5b0d4e.jpg

Green- Essie in Shake Your $$ Maker

 photo SummerSplatterTutorialNailArtSummer07_zps40cefc99.jpg

Blue- Sally Hansen in Blue Me Away!

 photo SummerSplatterTutorialNailArtSummer03_zpscfdbe908.jpg

White Base- Wet n Wild French White Creme

 photo SummerSplatterTutorialNailArtSummer02_zps2dd7a6c6.jpg

Top Coat- Revlon Colorstay Gel Shine Top Coat

I really hope you enjoy this manicure & my tutorial! I’d love to hear what you want to see next! Please don’t forget to subscribe to me on youtube so I know you’re watching! I so appreciate it!

Filed Under: Nails, Tutorials & Looks

Tropical Heat Eyeshadow Tutorial using the Smashbox Heat Wave Palette!

June 12, 2013 By StephanieLouise 409Leave a Commenthttps%3A%2F%2Fwww.allthingsbeautifulxo.com%2F2013%2F06%2Ftropical-heat-eyeshadow-tutorial-using.htmlTropical+Heat+Eyeshadow+Tutorial+using+the+Smashbox+Heat+Wave+Palette%212013-06-12+11%3A56%3A00StephanieLouisehttp%3A%2F%2Fwww.allthingsbeautifulxo.com%2F2013%2F06%2Ftropical-heat-eyeshadow-tutorial-using-the-smashbox-heat-wave-palette.html

 photo SmashboxHeatWaveMainPhotoTropicalHeatTutorial01_zps5cdbb65b.jpg

When I reviewed the Smashbox Heat Wave Palette I had already decided a tutorial had to happen. I don’t do many foiled tutorials but they are always really pretty. This is a pretty easy tutorial & although it involves quite a few shades it is easier with a wet brush. At the end, you’ll have a lovely tropical eye look! Keep reading to find out how & a list of all products used!

 photo UsingtheSmashboxHeatWavePalette12_zpsa397e8d4.jpg
 photo pictureguideswatcheseyes_zps4a03f89a.jpg

Get the Look:
I went ahead & took my swatches & labeled them. They are in the same order as in the palette. If you need a refresher on anything about the palette, check out my full review here!

I recommend doing your eye makeup before foundation to avoid fallout. Use an eyeshadow base, I used the Smashbox Photo Finish Lid Primer. Apply shade #2 foiled as your base shade. Blend out with a bit of shade #7 on the outer corner. Foil shade #4 & apply the inner corner & under the lashline about 1/3 of the way. Blend with a bit of dry up to the crease staying towards the front of the eye. Apply shade #8 along the base of your lashline for the outer 2/3 of your under eye foiled & flip the edge out a bit. Blend blend blend! Make sure you especially blend your lower lashline, use on of the shades dry if necessary for a clean line. Take shade #1 dry lightly & blend up onto the brow bone & along crease edges. Finish with liner & mascara.

 photo UsingtheSmashboxHeatWavePalette11_zps74bcb8ed.jpg
 photo SmashboxHeatWaveMainPhotoTropicalHeatTutorial010_zps2329b17a.jpg

Eyes:
– Smashbox Photo Finish Lid Primer
– Smashbox Heat Wave Palette (see the review & swatches here!)
– Smashbox Jet Set Waterproof Eye Liner in Deep Black
– L’Oreal Voluminous Carbon Black in Waterproof Black
– Milani Brow Fix Brow Kit in Light

 photo SmashboxHeatWaveTropicHeatEyeTutorial01_zps51bbbe4a.jpg
 photo EsteeLauderNaughtySmashboxHeatWave_zpse47281b8.jpg

Face:
– Maybelline Super Stay Foundation in Sand Beige mixed with Covergirl Outlast 3 in 1 in 805 Ivory (see my review here!). The Super Stay dried out my skin too much, next time I’ll mix it with something more moisturizing.
– Covergirl & Olay Simply Ageless Eye Concealer (in the pot) in 205
– L’Oreal Magic Lumi Concealer in Light
– Rimmel Wake Me Up Concealer in 125 Very Fair
– Skindivania Skin Setting Spray
 – Estee Lauder Blush in Naughty (review & swatches here!)

 photo SmashboxHeatWaveTropicHeatEyeTutorial06_zps998cf0f1.jpg

Lips:
-L’Oreal Colour Riche Balm in Caring Coral
– Smashbox Be Legendary Lipstick in Melondrama (just a touch in the center)

There you have it! What do you think? Any other tutorials you want to see?

Filed Under: Eyes, Tutorials & Looks

Fake a Taupe Eyeshadow Look with Lorac Pro + Rimmel Show Off in Nova Tutorial

May 28, 2013 By StephanieLouise 428Leave a Commenthttps%3A%2F%2Fwww.allthingsbeautifulxo.com%2F2013%2F05%2Ffake-taupe-eyeshadow-look-with-lorac.htmlFake+a+Taupe+Eyeshadow+Look+with+Lorac+Pro+%2B+Rimmel+Show+Off+in+Nova+Tutorial2013-05-28+17%3A22%3A00StephanieLouisehttp%3A%2F%2Fwww.allthingsbeautifulxo.com%2F2013%2F05%2Ffake-a-taupe-eyeshadow-look-with-lorac-pro-rimmel-show-off-in-nova-tutorial.html

 photo Rimmel-Nova-and-Lorac-Pro-Taupe-Tutorial-07_zps4fdd698b.jpg

If there is one look I create over & over it is a taupe eyeshadow look. Taupe makeup just makes me happy year round & I think it can really make my eyes pop when done a certain way. I love my Lorac Pro palette so much lately but I don’t find it has a true taupe that is taupe enough for me. What is a girl to do? Create one of course! Obviously I’m not a scientist but I’ve found that when you combine shades that you often see in shades of taupes correctly…it will look a bit duochrome or like a taupe itself. Ah, the eyes. So crazy. I’ll also be showing you how my first day of testing the new Rimmel Show Off (or Apocolips in the UK) in Nova looks! If you haven’t seen these yet, I showed you the displays popping up here! Every product used is listed below!

 photo Rimmel-Nova-and-Lorac-Pro-Taupe-Tutorial-05_zpsac64d290.jpg
 photo Rimmel-Nova-and-Lorac-Pro-Taupe-Tutorial-04_zpsd2433b58.jpg

Eyeshadow Tutorial:
Apply a primer first. Today I used the Lorac Eye Primer. Apply Taupe to the crease & blend well. You want to outline where your darkest shade will be. Mix a bit of slate & Pewter on a fluffy brush & work into outer corner. Blend, blend, blend. I brought it in pretty far for a dramatic look. Mix a bit of purple & black on the very outer corner if desired & bring down to create a slight V. Apply Pewter to lid & blend up lightly to merge colors. Apply a bit of Lt. Bronze directly to middle of lid to create a brightening, light catching look. Blend. Apply Cream to browbone foe highlight. Under your eye drag pewter on the outer half & Lt. Bronze on the inner blending well for a seamless transition. Apply a light touch of champagne to inner corner for brightening. Apply liner & mascara.

Products used:

 photo Rimmel-Nova-and-Lorac-Pro-Taupe-Tutorial-06_zpse6000150.jpg
Eyes-
Lorac Eyeshadow Primer
Lorac Pro Palette
Smashbox Jet Set Waterproof Eyeliner in Deep Black
Covergirl Clump Crusher Mascara in Black
Rimmel Scandal Eyes Mascara in Black

Brows-
Wet n Wild Color Icon Pencil in Taupe
Milani Brow Fix Brow Kit
Billion Dollar Brows Clear Brow Gel

 photo Rimmel-Nova-and-Lorac-Pro-Taupe-Tutorial-03_zps0e6947fe.jpg
 photo Rimmel-Nova-and-Lorac-Pro-Taupe-Tutorial-02_zpsc7dcc2f6.jpg

Face-
L’Oreal Miracle Blur (currently testing this!)
Beauty Blender was used for application of foundation
Covergirl Outlast Stay Fabulous Foundation in 805 Ivory (showed a video on this here!)
L’Oreal True Match Lumi Luminous Foundation mixed in a bit here & there
Maybelline Fit Me Concealer in 15 Fair
Covergirl & Olay Simply Ageless Eye Concealer in 205 (the one in the pot, not the new one)
Ben Nye Cameo Powder (which I hauled & talked about here)
 Tarte Amazonian Clay 12-Hour Blush in Stellar

 photo Rimmel-Nova-and-Lorac-Pro-Taupe-Tutorial-01_zps8931a870.jpg

Lips-
Rimmel Show Off (Apocolips in the UK) in Nova (sightings post here)

So there you have it! I loved this look & even gave you guys a sneak peek on Instagram. I will be swatching & reviewing the Lorac Pro Palette (I lost my original batch of photos…curses!) & the Rimmel Shop Off lippies soon so stay tuned for those! What do you think? Do you ever “create” shades? Some other shades I create are turquoise, violet, & coral.

Filed Under: Eyes, Tutorials & Looks

Pop of Peach & Pink Eyeshadow Tutorial using Too Faced Summer Eyes Palette

May 14, 2013 By StephanieLouise 444Leave a Commenthttps%3A%2F%2Fwww.allthingsbeautifulxo.com%2F2013%2F05%2Fpop-of-peach-pink-eyeshadow-tutorial.htmlPop+of+Peach+%26+Pink+Eyeshadow+Tutorial+using+Too+Faced+Summer+Eyes+Palette2013-05-14+12%3A24%3A00StephanieLouisehttp%3A%2F%2Fwww.allthingsbeautifulxo.com%2F2013%2F05%2Fpop-of-peach-pink-eyeshadow-tutorial-using-too-faced-summer-eyes-palette.html

 photo TooFacedPeachampPinkSummerEyesPaletteTutorial01_zps7bdf7cea.jpgI bought it. Affiliate links.

Can I just start off by saying how much I love this eyeshadow look? I mean really, I do intensely. Everything about this says summer to me & it just makes me so darn happy! I think the Too Faced Summer Eyes Palette (which I reviewed with swatches here!) is an awesome palette so I thought I’d show you my favorite look yet! Plus I’ll run down everything I’m wearing here as well if you keep reading!

 photo TooFacedPeachampPinkSummerEyesPaletteTutorial02_zps0e449c24.jpg photo TooFacedPeachampPinkSummerEyesPaletteTutorial03_zpsf962f23e.jpg

On my eyes:
Too Faced Summer Eyes Palette: Coral Crush on the lid, Plumeria in the crease, Seashell as a highlight, & Chocolate sun run along the lashline. These shadows are very easy to over blend so I definitely used the patting motion & I think primer is probably necessary.
Too Faced Eyeshadow Primer.
Rimmel Scandal Eyes in Black for the water line & brown on the lashline.
Covergirl Clump Crusher in Waterproof Black.
Rimmel Scandal Eyes in Black.

On my brows:
Milani Brow Kit
Billion Dollar Brows Setting Gel

 photo TooFacedPeachampPinkSummerEyesPaletteTutorial04_zpsacec5f41.jpg

On my Face:
Revlon Naked Foundation in the 2nd lightest shade (sorry I can’t find it!)
Too Faced Chocolate Soleil Bronzer
Tarte Amazonian Clay Blush in Curious
  

 photo TooFacedPeachampPinkSummerEyesPaletteTutorial05_zpsff778104.jpg

On my lips:
Milani Lipstick in Pink Punch

I love this look! What do you think? How do you wear your Too Faced Summer Eyes Palette? What other combos would you like to see? Check out my review & swatches here!

Filed Under: Eyes, Tutorials & Looks

Requested: LORAC GloGetter Minted Waves Eyeshadow Look & Tutorial

April 19, 2013 By StephanieLouise 470Leave a Commenthttps%3A%2F%2Fwww.allthingsbeautifulxo.com%2F2013%2F04%2Frequested-lorac-glogetter-minted-waves.htmlRequested%3A+LORAC+GloGetter+Minted+Waves+Eyeshadow+Look+%26+Tutorial2013-04-19+17%3A56%3A00StephanieLouisehttp%3A%2F%2Fwww.allthingsbeautifulxo.com%2F2013%2F04%2Frequested-lorac-glogetter-minted-waves-eyeshadow-look-tutorial.html

 photo glogettereyeshadow_zps0f1eb24d.jpg 

If you saw my review & swatches yesterday of the LORAC GloGetter Limited Edition Eyeshadow Palette then you know it is some sweet sweet love. I think this palette has an awesome array of shades & they all have a nice consistancy. I got a request to do an eyeshadow look using the right side of the palette so that’s what I will be showing you today! I love this side of the palette because it has that amazing mint which is why it is my main shade!

 photo DSCN7346_zps75fa039a.jpg photo DSCN7351_zps6b0911a5.jpg

Note- Please forgive the fact that my skin is looking a hot mess. I’m trying out a new BB Cream & my skin does NOT like it. The color is just sticking to any dryness on my face & if I was going out today I’d take it off & reapply. Blush is Revlon Cream Blush in Coral Cove which I’m totally loving though. On my lips is a touch of Christina Choi lipgloss in Jetsetter which I reviewed here. Love coral with the cooler shades on my eyes.

 photo DSCN7218_zps346f9f13.jpg
 photo DSCN7323_zpscc6fc77d.jpg
 photo DSCN7329_zpsba09360c.jpg

I used LORAC Eyeshadow Primer (from my LORAC Pro Palette, this doesn’t come with one) as a base. I then topped it with the mint shade & worked it up into my crease. I used the blue/perwinkle shade up into my crease & blended it out. I used the brown/rosy shade in just my outer corner. Under my eye I lined with Rimmel Scandal Eyes Eyeliner Pencil in Purple for a base then topped it with the rich purple shade. I used the highlight that is a satin on the other side of the palette instead of the more shimmery one. I used a liquid eyeliner for some drama & then layered on the mascara.

 photo DSCN7292_zpsfa67d36f.jpg

Here’s a look before mascara. I got some comments on a past look asking me to show without mascara sometimes because they had a hard time seeing what it looked like with all my lashes in the way. #1 I will take that as a compliment that I have nice lashes & #2 no problem here you go! This photo was pre-lippie obviously.

I hope you guys like this eyeshadow look! Hubby loved it of course because it involves purple & blue. If he chose my eyeshadow colors I’d pretty much wear them all the time! I love this combo!

Don’t forget that the LORAC GloGetter Palette (affiliate link) is Limited Edition, ULTA Exclusive, & only $20 so they are seriously flying off the shelves here. Order it online while you can or head over to your store asap!

Filed Under: Eyes, Tutorials & Looks

Teal & Brown Smoky Eye – Urban Decay Vice Palette

April 15, 2013 By StephanieLouise 476Leave a Commenthttps%3A%2F%2Fwww.allthingsbeautifulxo.com%2F2013%2F04%2Fteal-brown-smoky-eye-urban-decay-vice.htmlTeal+%26+Brown+Smoky+Eye+-+Urban+Decay+Vice+Palette2013-04-15+15%3A09%3A00StephanieLouisehttp%3A%2F%2Fwww.allthingsbeautifulxo.com%2F2013%2F04%2Fteal-brown-smoky-eye-urban-decay-vice-palette.html

 photo udvicepalettetealampbrown_zpsc4a0297f.jpg

I purchased this palette. Affiliate links.

When it comes to makeup palettes, I definitely go through phases. Right now my favorite is the Urban Decay Vice Palette which was limited edition & worth every penny. Each shadow is unique, pigmented, & just overall beautiful. I have been reaching for this palette so much…a lot more than I had actually thought I would. I don’t buy all of the Urban Decay LE palettes but this one really appeals to me because there are bright shades, neutrals, smoky shades, & awesome base colors. Today I’m showing you one of my favorite combos ever, teal & brown!

 photo DSCN6845_zps16dd64ae.jpg
 photo DSCN6847_zps2bc4c1f3.jpg

For this look I used the shade Junkie (the teal shade which actually looks way more green in the pan) & the brown smoky outer corner shade is Muse. I used anonymous as my subtle brown highlight. I just love this combo & I got lots of compliments the combination is really striking & looks even better in person.

 photo DSCN6873_zps188b5f25.jpg

I’m wearing Revlon Lip Butter in Cotton Candy (sorry I don’t have a hand swatch of this but maybe I need to do a swatch spam of the Revlon Lip butters I own?) on my lips & Tarte Amazonian Clay Blush in Exposed on my cheeks. On my face I believe I was wearing L’Oreal True Match Foundation. As an eyeshadow primer I stuck with my Urban Decay Eyeshadow Primer in Eden.

Do you love teal & brown together? What are some of your favorite smoky color combos? Do you love the Urban Decay Vice Palette?

Filed Under: Eyes, Palettes & Sets, Tutorials & Looks

Sephora Collection Outrageous Prisma Chrome Metallic Eyeshadow in Taupe #6 Review, Swatches, & Eyeshadow Look

March 7, 2013 By StephanieLouise 513Leave a Commenthttps%3A%2F%2Fwww.allthingsbeautifulxo.com%2F2013%2F03%2Fsephora-collection-outrageous-prisma.htmlSephora+Collection+Outrageous+Prisma+Chrome+Metallic+Eyeshadow+in+Taupe+%236+Review%2C+Swatches%2C+%26+Eyeshadow+Look2013-03-07+13%3A51%3A00StephanieLouisehttp%3A%2F%2Fwww.allthingsbeautifulxo.com%2F2013%2F03%2Fsephora-collection-outrageous-prisma-chrome-metallic-eyeshadow-in-taupe-6-review-swatches-eyeshadow-look.html

 photo SephoraOutrageousTaupe2_zps3add8450.jpg

Have you ever fallen in love with an eyeshadow? I’ve been there. & they so rarely break your heart (unless it is limited edition, breaks, or gets a formulation change…gasp!) I’m in love & it is limited edition so I’m informing you that you need to go get the Sephora Collection Outrageous Prisma Chrome Metallic Eyeshadow in Taupe #6. This is apparently limited edition (I didn’t know that when I bought it) but when I saw it on Pink Sith’s blog post here was just too fabulous to pass up. She loves taupe too so we’re eyeshadow sisters.

 photo SephoraOutrageousTaupe_zps34e50f0c.jpg

You can see this doesn’t lean as brown in the pan but it comes out in the swatches. This comes in plastic packaging but it doesn’t feel cheap. I always like the clear window on top so I know what I’m looking for. The eyeshadow itself is quilted & it was a bit heartbreaking to ruin it. Pretty. I know this is $16 which I normally don’t pay for a single eyeshadow from a brand I haven’t played with in person but you also get 0.12 oz of product. For reference, that’s 0.05 oz in your common MAC shadow. Now $16 seems like a bargain eh? Especially because this is so pigmented that I barely need to use much.

 photo SephoraOutrageousTaupeSwatches_zpsef4309ad.jpg

Let’s talk about taupe. There is a lot of different kinds of taupe. This is glorious. This particular taupe is metallic & lays somewhere between cool brown & cool silver-y lilac-y grey. Its taupe, it isn’t hard to explain okay? What you DO need to know is how amazingly pigmented this is. I’ve swatched so you can see it both wet & dry.Top is foiled bottom is a light finger swatch.

 photo SephoraTaupePrismaEyeshadow_zps21320a4f.jpg
I did this eyeshadow look before filming my February 2013 Favorites video & my Glossybox February 2013 box video. You can check out how it looks on film there! & don’t forget to subscribe! I used it dry on my lid & dampened (or foiled if you prefer) on my crease. If it looks patchy at all it is because it is metallic & caught the light not because I go out lookin a hot mess.

 photo SephoraOutrageousTaupeface_zps7ac15bfb.jpg
 photo SephoraOutrageousTaupeface2_zps5b7e1dc0.jpg

Here it is…& yes the smile is real. Because I’m wearing taupe. A fabulous taupe. A taupe I wasn’t able to compare to any of my other taupes. TAUPE. It makes me happy.

So there you have it, a whole bunch of talking about this fabulous Sephora Collection Outrageous Prisma Chrome Metallic Eyeshadow in Taupe #6 so hopefully you’ll appreciate it. The name is a bit ridiculously long, but I’ll allow it. After all, its taupe.
 
**I bought this shadow with my own money. Affiliate links have been used. I also linked to Pink Sith. She’s not giving me anything but she can if she wants to I suppose. 

Filed Under: Eyes, Reviews, Tutorials & Looks

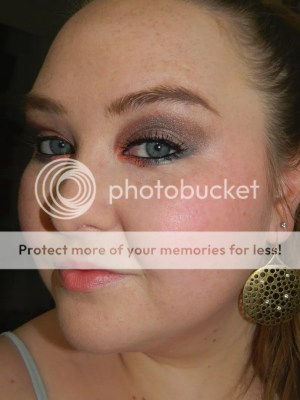
My Valentine’s Day Smoky Eyeshadow Look + What Was Used!

February 15, 2013 By StephanieLouise 537Leave a Commenthttps%3A%2F%2Fwww.allthingsbeautifulxo.com%2F2013%2F02%2Fmy-valentines-day-smoky-eyeshadow-look.htmlMy+Valentine%27s+Day+Smoky+Eyeshadow+Look+%2B+What+Was+Used%212013-02-15+14%3A31%3A00StephanieLouisehttp%3A%2F%2Fwww.allthingsbeautifulxo.com%2F2013%2F02%2Fmy-valentines-day-smoky-eyeshadow-look-what-was-used.html

 photo DSCN3822-Copy-Copy-Copy_zps25eddea3.jpg

So last night we ended up going to one of our favorite restaurants for Valentine’s Day expectantly. It is pretty casual so I went with jeans & a nice black top. For makeup…possibilities were endless. I haven’t done a smoky eye in awhile so I went with that!

 photo DSCN3797_zps28a910e8.jpg

 photo DSCN3799_zps44465550.jpg
Eyes:
– Maybelline Color Tattoo in Pomegranate Punk (used instead of primer
– Base shade Last Call is from the Urban Decay Ammo Palette
– Black blending crease shade is Oil Slick from the Urban Decay Ammo Palette
– Highlight shade is Sin from the Urban Decay Ammo Palette
– Urban Decay 24/7 Glide On Pencil in Perversion
– Eyeko London Skinny Liquid Eyeliner in Black
– L’Oreal Voluminous False Fiber Lashes Waterproof Mascara
– Maybelline Mega Plush Mascara in Black

 photo DSCN3841_zpsfa9d8648.jpg

Face:
– Covergirl Outlast Stay Fabulous 3 in 1 Foundation in 805 Ivory
– Revlon Colorstay in Light
– Maybelline Instant Age Rewind Concealer Brightener
-The Balm Bahama Mama Bronzer
– Wet n Wild Color Icon Blush in Heather Silk

Lips:
– Tarte Lip Surgence Natural Matte Lip Tint in Hope
-Jordana Pretty Shine Lipgloss in Lovely (just in the center

So that’s what I’m rocking tonight! What about you guys? I definitely want to see what you’re working with!

Filed Under: Eyes, Tutorials & Looks

  • « Previous Page
  • 1
  • …
  • 6
  • 7
  • 8
  • 9
  • Next Page »
Meet Stephanie Louise Telford- the blogger behind All Things Beautiful XO & Home in High Heels
Email Twitter Facebook Instagram Google Plus +
Pinterest Bloglovin Youtube tumblr RSS Feed

Recent Posts

  • Gifts to Snag for Happy Moments Right Now
  • Zoya Luscious Part B Collection Swatches & Review
  • Zoya Luscious Part A Collection Swatches & Review
  • Pixi by Petra Collagen Lip Gloss Review & Lip Swatch
  • Arise Jasmine Perfume Oil Roll-On from A Girl’s Gotta Spa! is my Purse Fragrance
  • Eye Looks featuring Urban Decay Wired Pressed Pigment Palette & Eyeliners – Two Options!
  • Urban Decay Wired Pressed Pigment Palette Review, Swatches, & Eye Looks
  • Urban Decay WIRED 24/7 Glide-On Eye Pencils in Jolt, Amped, Shock, & Vivid Swatches & Review
  • Stila Blue Realm Velvet Eye Shadow Palette Swatches & Review
  • Showing Off Pixi’s #20YearsOfGlow including my Favorites!

Popular

  • Check out my autumn nail inspiration- these foil nails are incredibly easy.Because fall nails don't always have to be dark & deep...manicures can be flashy or holo too! I'm completely in love with how easy these are to apply & the look is fantastic. Check out nail art, makeup, skincare, hair, & tons more All Things Beautiful XO My Foil Autumn Spectacular Manicure- Fall Nail Art!
  • Which Urban Decay Setting Spray is Right for You? Comparing UD Chill, All Nighter, & De-Slick sprays! See more makeup, beauty, & nails on All Things Beautiful XO Which Urban Decay Setting Spray is Right for You?
  • Mermaids. Ocean waves. Sparkle. These are a few of my favorite things! See my shifting green to blue eyeshadow look using Urban Decay! See more beauty, nail art, & makeup ideas on All Things Beautiful XO Shifting Blue & Green Mermaid Eyeshadow Look
  • Mani of the Day: Jail Bait from Spoiled Nail Polish
  • Rimmel Lasting Finish Nude Lipsticks by Kate Moss Collection Swatches & Review including the shades 40, 42, 46, 47, & 49. See more reviews, makeup tutorials, & nail art on All Things Beautiful XO Rimmel Lasting Finish Nude Lipsticks by Kate Moss Collection Swatches & Review
  • Best Drugstore Anti-Aging Hydrating Moisturizer in the Olay Regenerist Micro-Sculpting Cream on All Things Beautiful XO Best Drugstore Anti-Aging Hydrating Moisturizer
  • Fabulous Deborah Lippmann Nail Lacquer Shades- Swatches & Thoughts! 5 Fabulous Deborah Lippmann Nail Lacquer Shades- Swatches & Thoughts!

Categories:

Post History

Tweets by @StephLouiseATB
This error message is only visible to WordPress admins

Error: No connected account.

Please go to the Instagram Feed settings page to connect an account.


This blog at times uses affiliate links, sponsored material, & receives some products as samples in hopes of review. This in no way alters the articles/posts written & all opinions are my own or that of a guest writer. Please see my disclosure tab above header for more info.

Copyright © 2025 ยท Web Hosting By RFE Hosting