• Home
  • About
  • PR/Contact
  • Disclosure
  • Reviews
  • Sign Up
  • Shop My Stash

All Things Beautiful XO

Stephanie Louise Telford & her guide on beauty, style, & glitter!

NEW Rimmel Lasting Finish by Kate Moss Matte Lipsticks Review & Swatches

December 27, 2012 By StephanieLouise 595Leave a Commenthttps%3A%2F%2Fwww.allthingsbeautifulxo.com%2F2012%2F12%2Fnew-lasting-finish-by-kate-moss-matte.htmlNEW+Rimmel+Lasting+Finish+by+Kate+Moss+Matte+Lipsticks+Review+%26+Swatches2012-12-27+21%3A13%3A00StephanieLouisehttp%3A%2F%2Fwww.allthingsbeautifulxo.com%2F2012%2F12%2Fnew-rimmel-lasting-finish-by-kate-moss-matte-lipsticks-review-swatches.html

UPDATE: I found the rest of the shades! I’ve swatched all 10 shades, see the other 5 which includes a bit more color variation! 

Photobucket

So if you happened to check out my swatches & review of the original Kate Moss line for Rimmel (the ones in the black tube) then you know I’m a huge fan! Our partners across the pond had these ages before us & they actually have access to more shades…but I snapped up all of the shades availible at my CVS! There are 5 total so stay tuned for thoughts!

Photobucket

The packaging on these is identical to the original lipsticks except a nice shade of red. The top is slanted with the Rimmel crown icon & signed by Kate Moss in black. They are your usual twist up tube.

Photobucket

The shades each have a number rather than a name. While I prefer names, I love that these have the same shades on the stickers so you don’t have to open each tube to remember the names. I think these look quite a bit more expensive that the below $5 price tag.

Like I had said before, there were more shades available in other countries. I feel like we didn’t get as much variety but I still like these shades. These are matte lipsticks & long wearing without being harsh or too drying. Like all other matte shades, you need to start with a clean lip base. I usually exfoliate then apply lip balm before my makeup routine. When I’m done, I blot it off & use that as a smooth canvas. I’ll break each of the shades down below!

Left to right Rimmel Matte Kate Moss shades in 101, 103, 104, 109, & 113.
Photobucket

 101- Light cool toned pink. This is the perfect light pink lip that isn’t too light which makes it more wearable.

103- Medium cool pink. Love this, perfect go to pink shade.

104- Dusty rose pink. I love dusty rose type shades year round so this is great!

109- Bright orange coral. I love oranges so this is a great addition, can’t wait till spring!

113- Very light yellow/creamsicle toned nude. This one is SO hard for me to pull off because I’m so cool toned. I think this will be perfect as a concealer shade to lighten my lips & make other colors pop!

What do you guys think of these shades? I wish there had been a purple or red, I would love to see a matte version from them! If you love matte lippies, the price is way afforadable & I’m hoping these will be moved to permanent status in the drugstore!

Filed Under: Lips

Joyful Noise Cosmetics Winter/Holiday Nail Polish Swatches Part 2

December 27, 2012 By StephanieLouise 596Leave a Commenthttps%3A%2F%2Fwww.allthingsbeautifulxo.com%2F2012%2F12%2Fjoyful-noise-cosmetics-winterholiday.htmlJoyful+Noise+Cosmetics+Winter%2FHoliday+Nail+Polish+Swatches+Part+22012-12-27+16%3A56%3A00StephanieLouisehttp%3A%2F%2Fwww.allthingsbeautifulxo.com%2F2012%2F12%2Fjoyful-noise-cosmetics-winterholiday-nail-polish-swatches-part-2.html

Photobucket

So now that Christmas is passed & I feel like I’m running a bit late on these but I decided I wanted to show them off closer to New Years! This part has my favorite polish of all, Bling in the New Year! I hope you love them! Check out Part 1 of the Joyful Noise swatches + review with my favorite Christmas mix possibly of all time!


Photobucket
Photobucket
Photobucket
Warm & Toasty- Seen here over bare nails except my middle finger which is butterLONDON Pillar Box Red. Warm & Toasty is a mix of small red & orange glitter, red medium glitter,  & medium brown glitter in a clear base.

For some reason, this one was hard for me to photograph! The brown almost looks like shadows in some lighting but it actually really lovely! Definitely makes me think of warmth so it is also aptly named. This is 2 coats over bare nails & one coat over the red.

Photobucket
Photobucket

Star of Hope- This is a yellow metallic with small satin neon yellow hexes, super fine gold glitter, small yellow hex glitters, medium small hexes, & gold star glitters. Seen over bare nails except my ring finger which is butterLONDON Pillar Box Red.

I thought this would be a layering polish, thus one of my fingers having the red base, but this is definitely better on its own! I’m not a big yellow fan but this has the most dimension in a yellow I’ve ever seen. Very well thought out! I also love the addition of the star glitters, super fun! This would be a great accent nail as well!

Photobucket
Photobucket
Photobucket
Photobucket

Bling in the New Year- A clear base packed with super fine holo glitter, small bright blue glitter, small holo glitter, medium silver glitter, & medium blue glitter. All glitters are hexes except the superfine holo dust. Seen here over Zoya’s Natty. 

What you are looking at is glory in nail polish form. This is 2 really fine coats because I wanted to make sure you could see the galaxy like quality. Gorgeous. I love this over the dusty blue that is Zoya Natty. I highly recommend this combo! I wore this for over a week! I refused to take it off, it is holo awesomeness!

To purchase these polishes, head over to Joyful Noise Cosmetics on Etsy & remember to LIKE it on facebook to stay up to date on awesome deals, steals, & giveaways! I hope this has brought a bit of holiday cheer to your day & a ideas for a happy new year!

**Products sent in consideration of review. All opinions are my own. Not a sponsored post.

Filed Under: Indie/Handmade, Nails, Reviews

Starlooks Starbox December Palette Eyeshadow look!

December 26, 2012 By StephanieLouise 597Leave a Commenthttps%3A%2F%2Fwww.allthingsbeautifulxo.com%2F2012%2F12%2Fstarlooks-starbox-december-palette.htmlStarlooks+Starbox++December+Palette+Eyeshadow+look%212012-12-26+22%3A42%3A00StephanieLouisehttp%3A%2F%2Fwww.allthingsbeautifulxo.com%2F2012%2F12%2Fstarlooks-starbox-december-palette-eyeshadow-look.html

Photobucket

So earlier today I raved about my December Starlooks Starbox & promised to show you a look using the awesome palette inside! I loved this look so much, definitely a fun Christmas look! It was just my hubby & I this year so I didn’t play it safe! That white gold I adore so much was oh so lightly dusted on as a highlight.

Photobucket
 
I didn’t take lots of pictures of this look, but I adore the picture before! I think it came out really well even though I just did some quick photos!

Photobucket
This definitely made me think of a holiday season rainbow! What do you think? If you get a Starlooks Starbox, I’d love to see what kind of looks you have created!

Filed Under: Eyes, Tutorials & Looks

December Starlooks Starbox Review + Swatches!

December 26, 2012 By StephanieLouise 598Leave a Commenthttps%3A%2F%2Fwww.allthingsbeautifulxo.com%2F2012%2F12%2Fdecember-starlooks-starbox-review.htmlDecember+Starlooks+Starbox+Review+%2B+Swatches%212012-12-26+17%3A40%3A00StephanieLouisehttp%3A%2F%2Fwww.allthingsbeautifulxo.com%2F2012%2F12%2Fdecember-starlooks-starbox-review-swatches.html

Photobucket

I‘m so sorry this has taken so long to get up! My Starbox had to be resent & then the snow delayed it! Darn Nebraska! Anyway, I have swatches on this post & an eye look which I should have up later today! Excited!

So for this month they had a truly amazing box, a full palette with a wide array of glorious shades! This is definitely my favorite December box because I love the way they put the colors together. They used inspiration from the colored lights on a Christmas tree…brilliant! I love it so much & it is perfect for all year.

Photobucket
This box was a faded red with a gold holographic logo. Lovely! I keep all of these boxes to regift or store items.

Photobucket
Photobucket
Photobucket

Here’s the pretty sparkly snow insert (fun!) & the card that came with the box this month!

Photobucket

This palette is lovely & definitely a great representation of classic Christmas tree colors! Each color is set into the palette so there is no wiggling of these shades. The cover is clear with the Starlooks logo. 

& here are the swatches! These shades are amazing but my favorite is definitely the light gold/white shade. I adore these types of shades as a highlight or to layer over another color for the perfect touch of gold…I’m totally in love! These shades are wonderfully rich & have a variety of finishes.

Photobucket
Photobucket


For only $15 a month, the Starlooks Starbox is a steal. If you love makeup (which if you’re here, I’m guessing you do!) then this is definitely an excellent option. You receive full size makeup products & no foil packets hurrah! So there it is! If you are interested in signing up for a Starlooks Starbox, you can visit their site here. This isn’t an affiliate link but I’d appreciate it if you let them know I sent you their way! This box was provided for review, but as always my opinions are 100% my own! If you got other shades in your Starbox…I’d love to see them!

Filed Under: Subscriptions

5 Days of OCC Lip Tars: Stalker Swatches & Review

December 24, 2012 By StephanieLouise 599Leave a Commenthttps%3A%2F%2Fwww.allthingsbeautifulxo.com%2F2012%2F12%2F5-days-of-occ-lip-tars-stalker-swatches.html5+Days+of+OCC+Lip+Tars%3A+Stalker+Swatches+%26+Review2012-12-24+17%3A49%3A00StephanieLouisehttp%3A%2F%2Fwww.allthingsbeautifulxo.com%2F2012%2F12%2F5-days-of-occ-lip-tars-stalker-swatches-review.html

Photobucket

The last of my OCC Lip Tar swatches & I thought I’d go out with a festive red! Stalker is a true red & I’m totally loving it to pieces.

Photobucket
How to Apply: I can’t imagine using anything other than a lip brush. Because you only need a pintpoint amount, you need something with lots of control. Even for the lip stain type look I recommend a brush for even distribution. This is one of the few lip colors I trust to apply in the corners without a lipliner because it doesn’t smudge around or travel. I first line my lip with the color then pull it to the center. The opposite works just as well .

Photobucket

Top is the small dot needed to swatch. Bottom is the swatch. Color was then applied to lips.

Photobucket
Photobucket
After 1-2 thin layers it is easily opaque.
Color & Wear:  OCC describes Stalker as a “”true blue based red” & that it is. I saved this for last because I just adore it so much this time of year, look at that pigmentation! It is your classic go-to red shade. It isn’t too bright because of it has that cool base which makes it super flattering & a year round love. If you want a long wearing red without that dry or sticky feeling, I highly recommend OCC Lip Tar in Stalker!

If your lips are dry, I recommend exfoliating then applying a balm. Let that sink into your lips & then blot it off. Apply your OCC Lip Tar a tiny bit at a time. Less is more & it is ultra-buildable. I love the idea of this shade because it isn’t as neon as some of the other pinks. I now need a neon pink now though…successful product OCC.

Photobucket

Purchase: I bought mine from Sephora in a set but this shade is available on its own. OCC Lip Tars retail for $16.00 each. You can also purchase them from the Obsessive Compulsive Cosmetics website directly.

In case you missed my prior post, check out swatches of  OCC Lip Tar in Vintage, Grandma, Melange, & Pretty Boy!

Filed Under: Lips, Reviews

5 Days of OCC Lip Tars: Melange Swatches & Review

December 22, 2012 By StephanieLouise 600Leave a Commenthttps%3A%2F%2Fwww.allthingsbeautifulxo.com%2F2012%2F12%2F5-days-of-occ-lip-tars-melange-swatches.html5+Days+of+OCC+Lip+Tars%3A+Melange+Swatches+%26+Review2012-12-22+16%3A08%3A00StephanieLouisehttp%3A%2F%2Fwww.allthingsbeautifulxo.com%2F2012%2F12%2F5-days-of-occ-lip-tars-melange-swatches-review.html

Photobucket

I’m ridiculously irritated with the internet lately & since I haven’t posted in 2 days…you may have noted that. Oh snow. Luckily we still had power (not everyone here did!) but now that everything is up & running I have lots of catching up to do! Here’s the 2nd to last of my 5 Days of OCC Lip Tars post & the last one will be later on today! I’m excited to be back in working order!

Photobucket
How to Apply: I can’t imagine using anything other than a lip brush. Because you only need a pintpoint amount, you need something with lots of control. Even for the lip stain type look I recommend a brush for even distribution. This is one of the few lip colors I trust to apply in the corners without a lipliner because it doesn’t smudge around or travel. I first line my lip with the color then pull it to the center. The opposite works just as well .

Photobucket

Top is the small dot needed to swatch. Bottom is the swatch. Color was then applied to lips.

Photobucket
Photobucket

After 1-2 thin layers it is easily opaque.

Color & Wear:  OCC describes Melange as a “Terracotta Neutral” & although I wouldn’t have come up with that on my own, that isn’t a bad description I probably would call it a peachy brown. This isn’t the easiest shade for me to wear because I think it brings out the pink tones in my skin. I’ll have to work with this a bit more to get it to work with me. I’m thinking if I lightened it up a bit with a white base it would be more wearable? What do you guys think?

If your lips are dry, I recommend exfoliating then applying a balm. Let that sink into your lips & then blot it off. Apply your OCC Lip Tar a tiny bit at a time. Less is more & it is ultra-buildable. I love the idea of this shade because it isn’t as neon as some of the other pinks. I now need a neon pink now though…successful product OCC.

Purchase: I bought mine from Sephora in a set but this shade is available on its own. OCC Lip Tars retail for $16.00 each. You can also purchase them from the Obsessive Compulsive Cosmetics website directly.

In case you missed my prior post, check out swatches of  OCC Lip Tar in Vintage, Grandma, & Pretty Boy!

Filed Under: Lips, Reviews

5 Days of OCC Lip Tars: Pretty Boy Review & Swatches

December 20, 2012 By StephanieLouise 601Leave a Commenthttps%3A%2F%2Fwww.allthingsbeautifulxo.com%2F2012%2F12%2F5-days-of-occ-lip-tars-pretty-boy.html5+Days+of+OCC+Lip+Tars%3A+Pretty+Boy+Review+%26+Swatches2012-12-20+02%3A40%3A00StephanieLouisehttp%3A%2F%2Fwww.allthingsbeautifulxo.com%2F2012%2F12%2F5-days-of-occ-lip-tars-pretty-boy-review-swatches.html

PhotobucketI’m super excited about this week for 5 Days of! I currently own 5 Obsessive Compulsive Cosmetics (OCC) Lip Tars so they fit in perfectly! Today I’m showing you Pretty Boy, a freakin fantastic fuchsia. Keep reading to see swatches, on my lips, & my thoughts!

Photobucket

How to Apply: I can’t imagine using anything other than a lip brush. Because you only need a pintpoint amount, you need something with lots of control. Even for the lip stain type look I recommend a brush for even distribution. This is one of the few lip colors I trust to apply in the corners without a lipliner because it doesn’t smudge around or travel. I first line my lip with the color then pull it to the center. The opposite works just as well

Photobucket

Top is the small dot needed to swatch. Bottom is the swatch. Color was then applied to lips.

Photobucket
Photobucket
Photobucket

After 1-2 thin layers it is easily opaque. I didn’t do a “stain” photo today because this shade is honestly so pigmented I couldn’t get a stain to NOT look opaque!

Color & Wear: I love this shade so very much. I can totally see myself rocking this all spring & summer which is when I usually wear bold pink lips.  OCC describes Pretty Boy as a “Super-rich Fuchsia” & that is definitely a good description. This blue toned fuchsia is simply full of win.

If your lips are dry, I recommend exfoliating then applying a balm. Let that sink into your lips & then blot it off. Apply your OCC Lip Tar a tiny bit at a time. Less is more & it is ultra-buildable. I love the idea of this shade because it isn’t as neon as some of the other pinks. I now need a neon pink now though…successful product OCC.

Purchase: I bought mine from Sephora in a set but this shade is available on its own. OCC Lip Tars retail for $16.00 each. You can also purchase them from the Obsessive Compulsive Cosmetics website directly.

In case you missed my prior post, check out swatches of  OCC Lip Tar in Vintage & Grandma!

Filed Under: Lips, Reviews

Zoya Lovely for Spring 2013 Official Information

December 19, 2012 By StephanieLouise 602Leave a Commenthttps%3A%2F%2Fwww.allthingsbeautifulxo.com%2F2012%2F12%2Fzoya-lovely-for-spring-2013-official.htmlZoya+Lovely+for+Spring+2013+Official+Information2012-12-19+17%3A12%3A00StephanieLouisehttp%3A%2F%2Fwww.allthingsbeautifulxo.com%2F2012%2F12%2Fzoya-lovely-for-spring-2013-official-information.html

You know I LOVE me some Zoya. Seriously, just look for it i my search bar. Ridiculous obsession. Today we’re supposed to get a wicked storm here so I am super excited to bring you the Lovely line from Zoya for Spring 2013! These look like a fun take on spring & I can’t wait to get my hands on them. 

Photobucket

Lovely, just LOVELY!
Spring is awash in six soft and lovely new Zoya shades including three dewy metallics and three fresh blooms of cream. Poetic in nature, this collection is sure to capture the beauty of the season like no other….

 Zoya Lovely – spRING 2013 

-Piaf (ZP652) – Fresh Forsythia Yellow Metallic – Full Coverage (Originally designed for Fashion Designer Zang Toi)

-GeiGei (ZP651) – Blushing Cherry Blossom Pink Metallic – Full Coverage (Originally designed for Zang Toi/SS13)

-Julie (ZP650) – Soft Wisteria Purple Metallic – Full Coverage (Originally designed for Zang Toi/SS13)

-Blu (ZP653) – Lucky Hyacinth Blue Cream – Full Coverage

-Neely (ZP655) – Earliest Spring Green Cream – Full Coverage (Originally designed for Peter Som/SS13)

-Jacqueline (ZP654) – Perfect Magnolia Nude Cream – Full Coverage (Originally designed for Peter Som/SS13)


When the press info for the Zang Toi & Peter Som shows originally rolled in, I took note of Jacqueline, Neely, & GeiGei. I really want to see Piaf in person…I seriously cannot picture it in my head! I love the idea of creamy metallics for spring, gorgeous. Julie is easily going to be awesome…hello…it is purple. Blu looks so soft & gorgeous. I’m just estatic!

Filed Under: Nails

5 Days of OCC Lip Tars: Grandma Review & Swatches

December 18, 2012 By StephanieLouise 603Leave a Commenthttps%3A%2F%2Fwww.allthingsbeautifulxo.com%2F2012%2F12%2F5-days-of-occ-lip-tars-grandma-review.html5+Days+of+OCC+Lip+Tars%3A+Grandma+Review+%26+Swatches2012-12-18+23%3A14%3A00StephanieLouisehttp%3A%2F%2Fwww.allthingsbeautifulxo.com%2F2012%2F12%2F5-days-of-occ-lip-tars-grandma-review-swatches.html

Photobucket

I’m super excited about this week for 5 Days of! I currently own 5 Obsessive Compulsive Cosmetics (OCC) Lip Tars so they fit in perfectly! Today I’m showing you Grandma, a creamy coral. Keep reading to see swatches, on my lips, & my thoughts!

Photobucket

How to Apply: I can’t imagine using anything other than a lip brush. Because you only need a pintpoint amount, you need something with lots of control. Even for the lip stain type look I recommend a brush for even distribution. This is one of the few lip colors I trust to apply in the corners without a lipliner because it doesn’t smudge around or travel. I first line my lip with the color then pull it to the center. The opposite works just as well.

I seriously have to apologize for my swatches, I could NOT get my camera to cooperate. This is coming off more orange than it actually is & it has quite a bit more pink to it. I just tried & tried & couldn’t make this work. I tried color correcting them but imagine them a bit more pink pretty please?

 Photobucket
Photobucket

Top is the small dot needed to swatch. Bottom is the swatch. Color was then applied to lips.

Photobucket
Photobucket

After 1-2 thin layers it is easily opaque. 

Color & Wear: This is definitely a fun color but not something I’d wear everyday. I think this would be a great mixer to spring/summer up a lip color! OCC describes Grandma as a “clean, classic coral” & I think that is spot on!

If your lips are dry, I recommend exfoliating then applying a balm. Let that sink into your lips & then blot it off. Apply your OCC Lip Tar a tiny bit at a time. Less is more & it is ultra-buildable. I love the idea of this shade with heavy mascara & liner this spring for a retro feel. I feel like this is a tangerine based coral.

Purchase: I bought mine from Sephora in a set but this shade is available on its own. OCC Lip Tars retail for $16.00 each. You can also purchase them from the Obsessive Compulsive Cosmetics website directly.

In case you missed my prior post, check out swatches of  OCC Lip Tar in Vintage!

Filed Under: Lips, Reviews

Eyes: Dramatic Wet n Wild Shimmer ‘Til Morning Look + Tutorial

December 18, 2012 By StephanieLouise 604Leave a Commenthttps%3A%2F%2Fwww.allthingsbeautifulxo.com%2F2012%2F12%2Feyes-dramatic-wet-n-wild-shimmer-til.htmlEyes%3A+Dramatic+Wet+n+Wild+Shimmer+%27Til+Morning+Look+%2B+Tutorial2012-12-18+17%3A39%3A00StephanieLouisehttp%3A%2F%2Fwww.allthingsbeautifulxo.com%2F2012%2F12%2Feyes-dramatic-wet-n-wild-shimmer-til-morning-look-tutorial.html

Photobucket

I’m pretty excited to bring you guys a requested eye look today! I reviewed the Wet n Wild Sparkle ‘Til Morning Limited Edition Palette awhile back & got a few requests to do a tutorial for the left side of the palette as well. When I asked if you guys wanted to see something wearable (I consider the tutorial in that post to be pretty wearable) or something more dramatic the consensus was dramatic. Check out my tutorial below!

I used all 4 shades in the palette on the left side for this eye look…& it is super easy. I honestly forgot to put on eyeshadow primer before beginning so this is straight fro the pan. I love it, it was so fun in person!

Photobucket
Photobucket

Re-Create It:  I applied the copper crease shade to well..my crease. I worked that shade under my eye about 1/3 of the way as well connecting it to my crease. I then took that awesome definer shade & took that from my inner corner to about 1/4 of the way onto my lid. I then used a small crease brush to sweep it right above my socket bone to make a reverse cut crease. I also took that shade about halfway along my lower lash line. The brown eyelid shade was then lightly pressed onto the center of my eyelid & then blended at the edges on both sides & into the crease a bit. It should bend into the copper shade pretty seamlessly. I then popped just a touch of that between the two shades on my lower lashline to blend. I took the browbone shade with a fluffy brush very lightly below my brows.

Photobucket
Photobucket

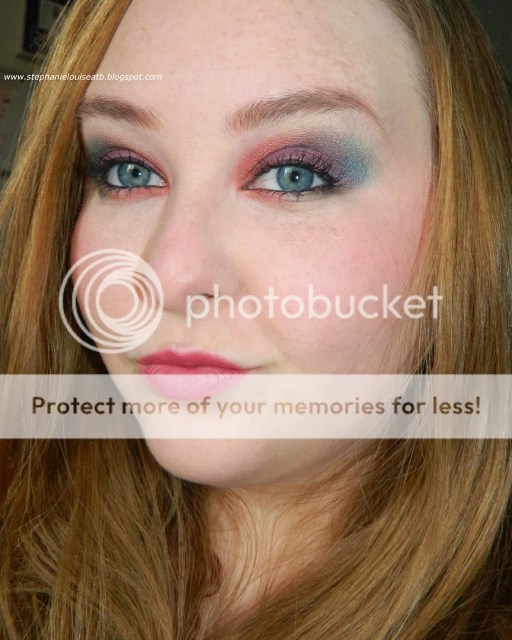
On my cheeks I’m using one of my favorite blush shades of all time which is Heather Silk from Wet n Wild. On my lips is Wet n Wild Megalast Lipstick in Peachy Keen.

I really hope you guys liked this look! I can’t wait to work with this side of the palette more in the spring/summer! This one is limited edition from Wet n Wild from the Holiday/Winter 2012 Collection but you might still be able to snag it? I’ve seen a few from this collection here & there! I found mine at Walgreens.

Filed Under: Eyes, Tutorials & Looks

  • « Previous Page
  • 1
  • …
  • 91
  • 92
  • 93
  • 94
  • 95
  • …
  • 135
  • Next Page »
Meet Stephanie Louise Telford- the blogger behind All Things Beautiful XO & Home in High Heels
Email Twitter Facebook Instagram Google Plus +
Pinterest Bloglovin Youtube tumblr RSS Feed

Recent Posts

  • Gifts to Snag for Happy Moments Right Now
  • Zoya Luscious Part B Collection Swatches & Review
  • Zoya Luscious Part A Collection Swatches & Review
  • Pixi by Petra Collagen Lip Gloss Review & Lip Swatch
  • Arise Jasmine Perfume Oil Roll-On from A Girl’s Gotta Spa! is my Purse Fragrance
  • Eye Looks featuring Urban Decay Wired Pressed Pigment Palette & Eyeliners – Two Options!
  • Urban Decay Wired Pressed Pigment Palette Review, Swatches, & Eye Looks
  • Urban Decay WIRED 24/7 Glide-On Eye Pencils in Jolt, Amped, Shock, & Vivid Swatches & Review
  • Stila Blue Realm Velvet Eye Shadow Palette Swatches & Review
  • Showing Off Pixi’s #20YearsOfGlow including my Favorites!

Popular

  • Best Drugstore Anti-Aging Hydrating Moisturizer in the Olay Regenerist Micro-Sculpting Cream on All Things Beautiful XO Best Drugstore Anti-Aging Hydrating Moisturizer
  • Sephora Supreme Cleansing Oil Review & How I Use It!
  • Wavy Ombre Teal Mermaid Hair Check out the best hair products to get the most fabulous beachy waves, treat, & style them on All Things Beautiful XO 6 Hair Products to Get the PERFECT Summer Beachy Waves & Styles
  • New L’Oreal Infallible Shade in Blinged & Brilliant Dupe Alert & Comparisons!
  • Swatches & Review of the Zoya Luscious Part A Collection - shades in Wanda, Patrice, Teresa, Andrea, Bentley, and Sharon on All Things Beautiful XO Zoya Luscious Part A Collection Swatches & Review
  • Infiniti Pro by Conair Auto-Rotating Curling Iron Review + Uses
  • Skindinavia The Makeup Primer Spray Review

Categories:

Post History

Tweets by @StephLouiseATB
This error message is only visible to WordPress admins

Error: No connected account.

Please go to the Instagram Feed settings page to connect an account.


This blog at times uses affiliate links, sponsored material, & receives some products as samples in hopes of review. This in no way alters the articles/posts written & all opinions are my own or that of a guest writer. Please see my disclosure tab above header for more info.

Copyright © 2026 · Web Hosting By RFE Hosting