• Home
  • About
  • PR/Contact
  • Disclosure
  • Reviews
  • Sign Up
  • Shop My Stash

All Things Beautiful XO

Stephanie Louise Telford & her guide on beauty, style, & glitter!

TRUE BLOOD Countdown Day 3: Jessica’s Look

June 24, 2011 By StephanieLouise 10087 Commentshttps%3A%2F%2Fwww.allthingsbeautifulxo.com%2F2011%2F06%2Ftrue-blood-countdown-day-3-jessicas.htmlTRUE+BLOOD+Countdown+Day+3%3A+Jessica%27s+Look2011-06-24+22%3A10%3A00StephanieLouisehttp%3A%2F%2Fwww.allthingsbeautifulxo.com%2F2011%2F06%2Ftrue-blood-countdown-day-3-jessicas-look.html

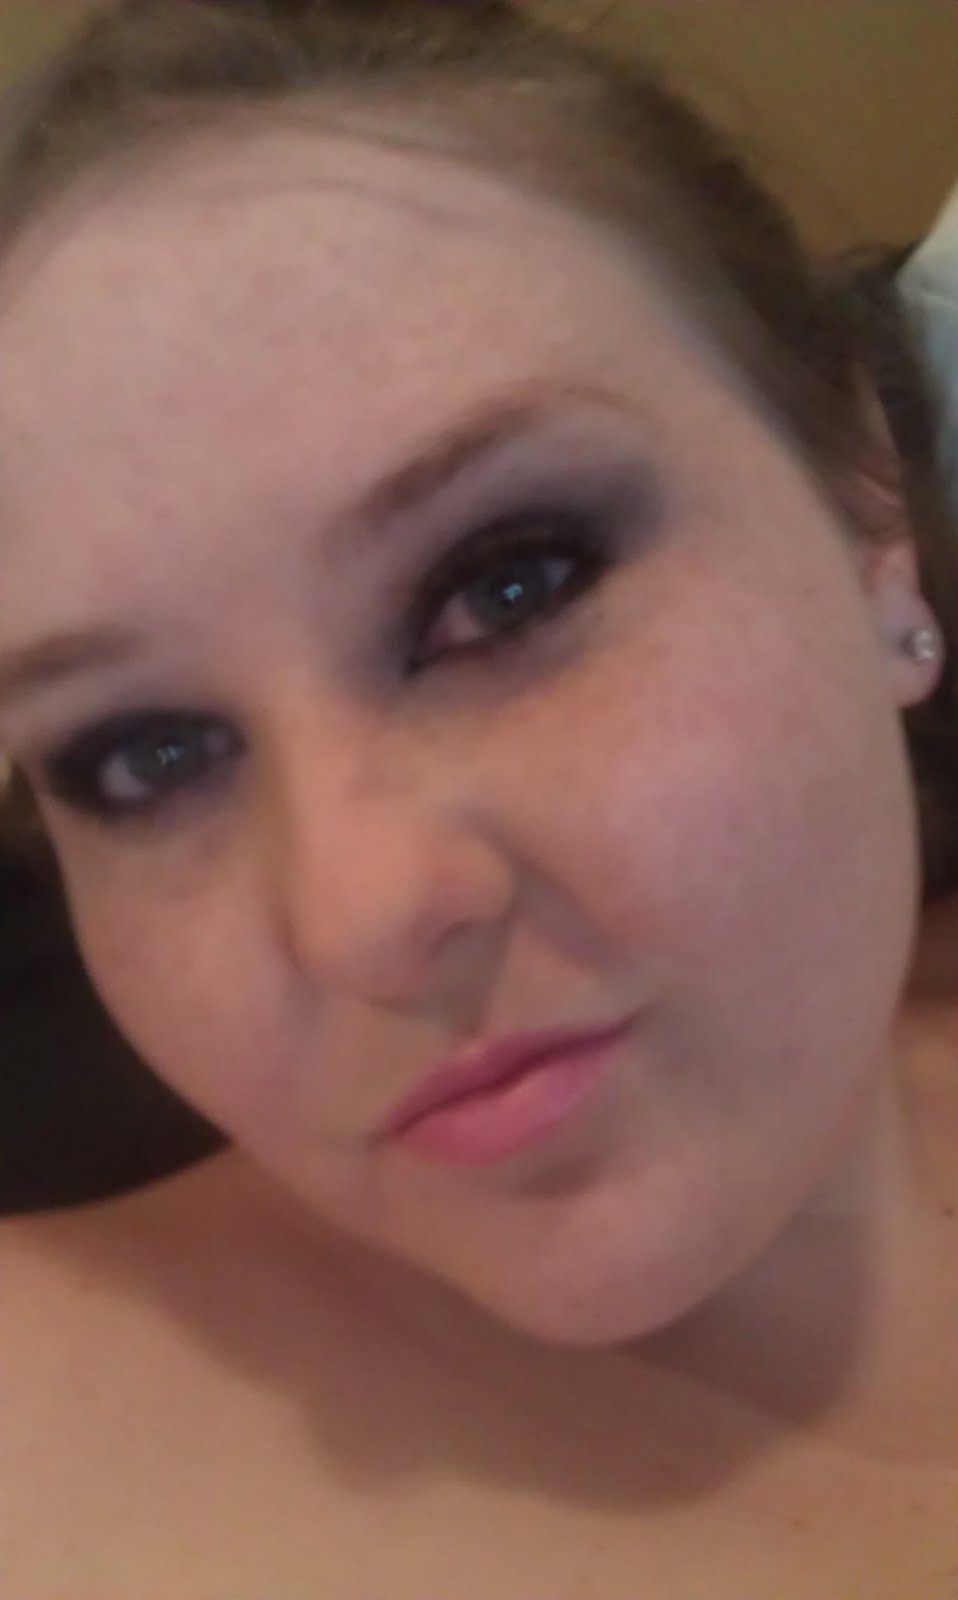
Jessica’s look will be a matte gray smoky eye with a pink lip.


Here is my Version of this Look:

To get this look, keep reading!!!!

Face:


Products Used:
– Hard Candy Sheer Envy Skin Perfecting Primer
– Revlon PhotoReady Concealer in 002 Light
– Maybelline Dream Matte Mousse in Light #3
– Rimmel Stay Matte Pressed Powder in 005 Silky Beige
– ELF All Over Cover Stick in Spotlight
– ELF Wet Gloss Brow Clear Mascara

How To:
1. Apply face primer on clean, dry skin. Place a small amount on face and run in well. Let set 5 minutes.
2. Apply eye primer to eyelids or use face primer if acceptable.
3. Apply concealer to under eye area and problem areas if necessary. You can also apply this after foundation if you wish.
4. Apply foundation and then set with powder. Use setting power if desired, I recommend ELF HD setting powder.
5. Apply ELF Cover Stick in Spotlight to cheek bones, blend with fingertips. You can also apply this to your cupids bow for this look.
6. Use ELF brow gel to set brow shape brushing in an upwards motion. If you’re doing eye makeup I do this AFTER I’m done apply all my makeup as my left step so it doesn’t attract fallout

ELF All Over Cover Stick in Spotlight. Available from eyeslipsface.com.


Eyes:

Products Used:
– Physicians Formula Shimmer Strips Custom Eye Enhancing Gel Cream Liner in the black from Brown Eyes Collection. Comes in a trio. Other sets available.
– ELF Mineral Eyeshadow in Partier.
– L’Oreal HIP High Intensity Pigments in 102 Exciting.
– ELF Eyelash Curler.
-Covergirl LashBlast Mascara in Very Black.
– Revlon Custom Eyes Adjustable Mascara in Blackest Black.

How To:
1. Apply eyeliner using an angled eyeshadow brush (mine is from Sonia Kashuk) to the inner eye, both top and bottom. Then apply eyeliner to eyelid as close to the lashes as you can in a straight line of medium thickness from outer corner to inner using small, precise strokes.
2. Tap some of the ELF Partier in the lid lightly and dip your eyeshadow brush in. Apply eyeshadow gradually in order to build up color evenly. Apply it in the crease to darken look and blend out and up. Apply eye highlight if desired.
3. Tap some of the L’Oreal in Exciting into its cap lightly and dip in an angled eyeliner brush. Apply to inner corners of the eye, both top and bottom. Blend out.
4. Curl lashes with ELF Eyelash Curler (Only $1!!!)
5. Apply mascara wiggling from base to tip.

Left to Right: HIP in Exciting, Physician’s Formula in black (for Brown Eyes), ELF matte shade in Partier.

Lips:

 For my lips I kept it simple. I used a GORGEOUS shade called 220 Pink Chic from Rimmel Moisture Renew. So moisturizing with great pigment. Non-shimmer and not overly shiny.

What do YOU think of this look? Would you rock it? How often do you use matte colors like this?

I can’t wait for True Blood on Sunday!!!! Get ready for another look tomorrow!

XOXOXO

Free Men of True Blood Calendar on orders of $50 or more. Click Here


Shop  HBO for True Blood Special Offers

Filed Under: Uncategorized

Happy Birthday Selma Blair!

June 23, 2011 By StephanieLouise 1009Leave a Commenthttps%3A%2F%2Fwww.allthingsbeautifulxo.com%2F2011%2F06%2Fhappy-birthday-selma-blair.htmlHappy+Birthday+Selma+Blair%212011-06-23+16%3A46%3A00StephanieLouisehttp%3A%2F%2Fwww.allthingsbeautifulxo.com%2F2011%2F06%2Fhappy-birthday-selma-blair.html

It takes a serious woman to be able to switch from girl next door to leading lady to edgy chick. Happy birthday Selma, cheers to you for being your own person with your own look.

Photo Credit:www.pynkcelebrity.com
Photo Credit: www.photos0.com
Photo Credit: Peter Kramer/Gettty

Photo Credit: www.lemurpublishing.com

Photo Credit:Mark Von Holden/WireImage.com

Photo Credit: www.photo0.com

Filed Under: Uncategorized

Calling All True Blood Fanatics…

June 23, 2011 By StephanieLouise 10102 Commentshttps%3A%2F%2Fwww.allthingsbeautifulxo.com%2F2011%2F06%2Fcalling-all-true-blood-fanatics.htmlCalling+All+True+Blood+Fanatics...2011-06-23+11%3A53%3A00StephanieLouisehttp%3A%2F%2Fwww.allthingsbeautifulxo.com%2F2011%2F06%2Fcalling-all-true-blood-fanatics.html

Here’s a sneak peek at what will be hitting the blog tomorrow……

 Sink your fangs in and enjoy……
XOXOXO

Filed Under: Uncategorized

Make Your Own Lip/Body/Foot Scrub!!!

June 22, 2011 By StephanieLouise 10116 Commentshttps%3A%2F%2Fwww.allthingsbeautifulxo.com%2F2011%2F06%2Fmake-your-own-lipbodyfoot-scrub.htmlMake+Your+Own+Lip%2FBody%2FFoot+Scrub%21%21%212011-06-22+22%3A58%3A00StephanieLouisehttp%3A%2F%2Fwww.allthingsbeautifulxo.com%2F2011%2F06%2Fmake-your-own-lipbodyfoot-scrub.html

Love buying scrubs but want to learn to make your own? You can, and at the fraction of the cost!

 Choose Your Exfoliant and Oil

 Salt/Sugar:
There are lots of exfoliates out there but I like to stick with the standard sugar or salt scrub.
Some options: brown sugar, raw sugar, table sugar, flavored natural sugars, sea salt, table salt, coarse salt, and large grain salt. You can also use epsom salts or
mix half epsom salts with sugar or salt to create your scrub.

When using salt scrubs, there are some things you definitely need to remember. If you have an open wound or skin irritation, salt WILL sting. If is also harder, so you might want to grind some of it finer or use it in a foot bath. Salt is not only muscle relaxing, but also detoxifying.

If you’re using sugar, you can use any of the types above at your preference. Brown sugar has a stronger scent and is gentler against the skin. Remember that sugar scrubs do not contain muscle relaxing qualities like the salt scrubs do.

Oils:

You can choose from a wide variety of oils to make your scrub, and some you probably have in your pantry now! Your oil will be your moisturizer. As you exfoliate away the dead swin, your new skin will become moisturized thanks to your oil selection.

Some types to try: Safflower oil, olive oil, jojoba oil, grapeseed oil, coconut oil, sweet almond oil, and remember you can add a few drops of scented oils like lavendar,vanilla, citrus or floral oils.

Note: Don’t use baby oil as it will not penetrate your skin and moisturize it.When choosing your oil, remember to consider allergies. For instance, I’m not allergic to peanuts but my best friend is.

When creating your scrub, you might want to consider a multi-tasking ingredient. You can add epsom salts in combination with your regular salt for a different consistency. Add baking soda for a nice fizz. Honey is a natural moisturizer if you have dryer areas to exfoliate like feet or elbows. You can also grate up soap finely to make a combination scrub/cleanser.

Scenting Your Scrub:
You have tons of options when it comes to giving your scrub an amazing scent. Besides scented oils, you can also try natural ingredients like ginger zest for extra soft exfoliation, citrus zest, and you can also try clear teas. Try something like jasmine, green tea, or a white tea. They smell amazing and can be very relaxing, as well as a pleasant scent. You can also try fresh herbs like mint or lavender. Steep the tea or herbs in oil by gently pressing the leaves to get the oils out to scent it. You can also put it through a food processor to blend it all together and strain it if you wish.

Combinations to Consider:

Ginger brown sugar
Lavender chamomile
Orange zest and honey
Vanilla brown sugar
Peppermint salt scrub
Lemon Sage
Mint green tea
Jasmine and rose
Lemon and lime zest with coconut oil
Peach tea and grapefruit
Almond vanilla
Brown sugar coffee

Keep your scrub in an airtight container. If it is kept in the shower, remember that water needs to not be able to penetrate it. Lip scrubs should be very fine, consider grinding it. Hope these recipes and information helped you!

Filed Under: Uncategorized

Nail Polish Bottles Emulating Art

June 22, 2011 By StephanieLouise 10124 Commentshttps%3A%2F%2Fwww.allthingsbeautifulxo.com%2F2011%2F06%2Fnail-polish-bottles-emulating-art_22.htmlNail+Polish+Bottles+Emulating+Art2011-06-22+20%3A02%3A00StephanieLouisehttp%3A%2F%2Fwww.allthingsbeautifulxo.com%2F2011%2F06%2Fnail-polish-bottles-emulating-art.html

It seems like as nail polish colors progress, so do the once plain bottles that contained them. Here are the bottles of nail polish I have found to be particularly artistic or beautiful:

OPI Bling Bottle from Special Event in Taiwan.      
Anna Sui Shimmer Nail Polish Available from Urban Outfitters.

White Marshmallow Cube Available from Hot Topic.

Need Me from Enchant Cosmetics China.

No 7 Nail Polish.

Forever 21 Nail Polish.

Jill Stuart Nail Lacquer.

Specialty Nail Polish from Nails Inc. for the Royal Wedding.

Sheswai Laquer.


Filed Under: Uncategorized

Beauty Icon: Christie Brinkley

June 22, 2011 By StephanieLouise 1013Leave a Commenthttps%3A%2F%2Fwww.allthingsbeautifulxo.com%2F2011%2F06%2Fbeauty-icon-christie-brinkley.htmlBeauty+Icon%3A+Christie+Brinkley2011-06-22+03%3A51%3A00StephanieLouisehttp%3A%2F%2Fwww.allthingsbeautifulxo.com%2F2011%2F06%2Fbeauty-icon-christie-brinkley.html

Sports Illustrated Cover 1979. Age 25.
2008 Metropolitan Opera Opening. Age 54.  Photo By: Andrew H. Walker, Getty Images.  

65th Annual Tony Awards 2011. Age 57. Photo By-Jason Kempin/Getty Images North America


Is it just me or is she even better looking now? She is aging incredibly! Some speculate about surgeries, but either way, she’s stunning. Let this be a lesson to all of us young ladies to take care of our skin so we may age as gracefully!

Filed Under: Uncategorized

My HUGE Konad Nail Art System and Overview!!!

June 21, 2011 By StephanieLouise 10146 Commentshttps%3A%2F%2Fwww.allthingsbeautifulxo.com%2F2011%2F06%2Fmy-huge-konad-nail-art-system-and.htmlMy+HUGE++Konad+Nail+Art+System+and+Overview%21%21%212011-06-21+21%3A55%3A00StephanieLouisehttp%3A%2F%2Fwww.allthingsbeautifulxo.com%2F2011%2F06%2Fmy-huge-konad-nail-art-system-and-overview.html

This has been much requested, so I hope you find it helpful!

Let me start with I love my Konad system. If you aren’t familiar with the system click here to read reviews and learn more. If you are familiar an perhaps on the fence, then I hope you find this informative and helpful! I have bought all of these items with my own money off Amazon, so I will provide links to my purchases down below. You will definitely want to check it out.

So here is my little set up I’m using, normally I set up elsewhere, but the lighting wasn’t as good and the blue makes the tools stand out more. That said here we have here my nail polish remover in the upper
left with the lid and remover to the right, tweezers in the middle, Konad nail polish scrapper in the bottom left, image plate holder in the middle, and the double ended stamper in the right hand corner.

Left Hand Nail Polish from Left to Right: Covergirl Boundless color in White Night, Sally Hansen Salon Laquer in Alchemy, Singul Colors in Why Not, Sally Hansen Xtreme Wear in Going Green, and Icing Nail Polish in Butta availible from Claire’s.

Nail Polish Right Hand from Left to Right: Milani 3D Holographic in Hi-Res, Revlon Top Speed in Golden, Sinful Colors in 24/7, Sally Hansen Chromes in Aqua Chrome, and LA Colors Color Craze in 564.

Ok so let’s get started on the how to!Below are a serious of picture in which I have labeled with a number and brief description. Below the pictures will be clearer instructions.

1: The set up.

2: Image plate with polish.

3: The scraping motion.

4: What your image plate should look like if you have scraped it correctly.

5: Close up of what your plate should look like.

6: The first step of the rolling motion.

7: Middle of rolling motion.

8: Completed rolling motion.

Image on large stamp side.

 Step 1: First you want to start with a clean dry image plate. If you have used your image plate beforehand and it needs to be cleaned, please see below so that you can see how to do it. Excess nail polish remover WILL thin out the nail polish which needs to be thick. I will talk more about the best polishes besides Konad later on. Place your image plate on the image plate holder. Although this is sold separately and not technique required, I HIGHLY recommend it as it makes the process easier, faster, and less messy.

Step 2: Apply a nice, dense amount of nail polish over the image you want to stamp. Make sure you completely cover the image or it won’t all end up on the stamper.

Steps 2-3: Next comes the scraping process. Before we scrape please not you must be QUICK to scrape after having applied the nail polish or else it will dry into smaller details and not come out as detailed. To scrape your chosen image place the Konad scraper on the image pate at the bottom of your design. Pushing down, swiftly scrape upwards to

Image on small stamp side.

 remove excess polish. You want to practice this method if you are having trouble because you can’t continuously scrap as the nail polish begins to dry and it smears the polish making spaces in between your image streaky.

Steps 4-5: This is how your image should look after a correct scrape. You want to be able to clearly see the image imprint without having any streaks. Make sure you scrape the image completely or the excess polish will not be cleared away.

 Steps 6-8: This is the key to the whole process. I call this the “rolling motion”. You have to successfully “roll” the image onto the stamper in order to roll it onto your nail. The stamper I use is double ended. You can get a regular, but for not much more at all you can have the dual stamper where you also get the smaller green stamper area for smaller images. In order to place your image on the stamper, place the side of your stamper on the side of the image and roll it ONCE from right to left applying slight pressure. Do not roll it again as it will completely mess up the image and is likely to dry before you can apply it to your nail.

 To Apply Image To Nail: You want to repeat the rolling motion with the stamper to the nail just like you you did with the image plate. Start from one side of your nail and roll applying light pressure to ensure image replication. Voila! Once you have mastered the rolling process it becomes quite simple!!!

Cleaning Your Image Plates:


After each use, you need to clean your image plate, scraper, and stamper. It is very easy and very quick, so don’t start thinking that this will be a lot of work. I like my CVS brand instant polish remover because it comes with a scrubber which you can see in the overall picture. You can also use any kind of cotton ball/swab, but I have found this works great to get into the images nooks. Lightly run the scrubber over all surfaces with nail polish until sufficiently clean. It doesn’t have to be perfect because you will clean everything at the end, you just have to remove excess polish. Next, take a swab (I use just a normal Q-tip) and remove excess nail polish remover from the plate so it doesn’t thin the polish the next time you use it, especially if you are using the same image plate. Personally, this is how I clean mine but find the best option that works for you.

How to Choose the Correct Nail Polish to Create Images:

Left to Right, Left Hand Nail Designs: Wet n Wild in Black Creme, OPI in OPI Red, Wet n Wild in Geranium, and Sally Hansen Complete Salon Manicure in Thinking of Blue.

Left to Right, Right Hand Designs: Sally Hansen Complete Salon Manicure in Thinking of Blue, LA Colors Color Craze in #571, Essie in French Affair, Sinful Colors in Innocent, and Wet n Wild in Black Creme.

How to Choose Polishes:
Above are the polishes I used to create images on my nails. Konad sells their own polishes which are perfect for this system obviously, however they are pricey considering you would only use them for images. Me being money-savy, I set out to find another way. The key is to use thick polishes. The best polishes I have found are my older polishes as they have thickened up over the years. Check out how old that Wet n’ Wild is up there haha. The best way to find nail polishes for the Konad? Try and try again. Just practice on clean nails to see how opaque the image will be and then you can decide!

FINALLY a few examples of designs! These are designs I did quickly just to show you the basics. I tried to do a wide range of interests, but if there are specific designs you want to see just let me know! I didn’t clean up my nails very thoroughly because I didn’t want to apply a top coat so you could see the designs just on top of nail color.  Left hand is smaller designs and right hand has full nail design patterns. I also have a lot of image plates that are just for the nail tips, like french manicure designs.  If you would like me to post all of my image plates so you can make requests, just let me know because i have a lot of them!!!

Left Hand Small Designs.

Thumb: Skull and Crossbones, Pointer: Vines, Middle: Soft Florals, Ring: Silver Metalic Heart, Pinkie: Anchor with Sponged Tips.

Sorry its blurry but it really turned out good!

Right Hand Full Image Designs.

I love red over gold, even if it is a bit holiday-ish!
I use animal prints over shimmers A LOT!!!

So that’s my overall on the Konad Nail Art System!!! Overall it is an AMAZING savings when you compare the total cost to that against manicure. I bought all of it for the same amount as 2 manicures, can’t beat that! Please tell me what you think and what you want to see! I will be doing more professional looks soon! Below are the ACTUAL LINKS to the products I bought on Amazon. I bought BOTH batches of nail plates for a small fraction of the price of Konad brand plates and I love them! They’re great!!! Plus if you click on of the links below you can read amazon reviews for all of the products and see awesome close ups of the image plates, there are a ton of them!


Filed Under: Uncategorized

Mani of the Day 6/20/2011

June 20, 2011 By StephanieLouise 1015Leave a Commenthttps%3A%2F%2Fwww.allthingsbeautifulxo.com%2F2011%2F06%2Fmani-of-day-6202011.htmlMani+of+the+Day+6%2F20%2F20112011-06-20+17%3A13%3A00StephanieLouisehttp%3A%2F%2Fwww.allthingsbeautifulxo.com%2F2011%2F06%2Fmani-of-the-day-6202011.html

Got to love a little (or a lot) of Glitz!

OPI Mad as a Hatter, Alice in Wonderland Collection.

 Base Coat-Borghese Magnetico Adhesive Base Coat
Base Color- Essie French Affair (1 coat)
Main Color- OPI Mad as a Hatter (2 coats)
Top Coat- Sally Hansen Hard as Wraps Acrylic Gel + Nylon
 Note: Sorry! Didn’t clean up my top coat! OOPS!

So you can see all the different colors in action!

Check them out on Amazon for more information!

Filed Under: Nails

Green Lantern Manicure

June 19, 2011 By StephanieLouise 10162 Commentshttps%3A%2F%2Fwww.allthingsbeautifulxo.com%2F2011%2F06%2Fgreen-latern-manicure.htmlGreen+Lantern+Manicure2011-06-19+23%3A05%3A00StephanieLouisehttp%3A%2F%2Fwww.allthingsbeautifulxo.com%2F2011%2F06%2Fgreen-lantern-manicure.html

Oh Ryan Reynolds, how I adore thee.

I decided to do a manicure dedicated to Green Lantern since I love the color green and the posters were great. Here is how it all turned out and the products I used!

Left to Right: Sinful Colors in Innocent,
Milani 3D Holographic in Hi-Tech, & Femme Couture Nail Laquer in Garland.

 Here is a close up of Femme Couture Nail Laquer in Garland. It looks almost black in the bottle but really has a beautiful deep green shine. For this manicure I used the sponging technique. Basically, you paint your nail with a base color (Sinful Colors-Innocent) then you let that dry. Next comes the sponging! You can use pretty much any type, but they WILL give you different effects. If you use a large pored sponge, simply cut of the corner and dip in polish or paint heavily. Expect a messier application and bigger marks. You can also use smaller pored sponges with handles on them, found in discount stores for cheap. You can also pick them up in the craft/painting section of craft stores or Walmart/Target. I prefer to use smaller pored sponged simply because I like the effect better.


For this look, I decided to do an accent nail. This one happens to be on my ring finger using a darker base coat for a little bit of villainous appeal.
For that nail in particular I used the following nail polishes in the following order: Covergirl Boundless Color in Midnight Magic (applied to whole nail on top of base coat), Milani Holographic 3D in High Tech (Sponged 2/3 of nail from top to bottom), and lastly LA Colors Color Craze in color #571 (Sponged at the tip).  The silver is highly metallic and has great coverage.

If you aren’t doing an accent nail, ignore the portion above!

My manicure with my bottle of Femme Couture Nail Laquer in Garland.
This picture is before I touched them up, but it captured the shimmer and brightness really well.

And lastly, my manicure with my bottle of Milani 3D Holographic in High Tech, which is spectacular.

For a base coat I used Magnetico by Borghese and my top coat (applied lightly) is Mega Shine Extended Wear Top Coat by Sally Hansen.

And that’s it! What do you girls think? What are some of your favorite green nail polishes?

Filed Under: Nails

June 2011 Birchbox

June 18, 2011 By StephanieLouise 10172 Commentshttps%3A%2F%2Fwww.allthingsbeautifulxo.com%2F2011%2F06%2Fjune-2011-birchbox.htmlJune+2011+Birchbox2011-06-18+17%3A47%3A00StephanieLouisehttp%3A%2F%2Fwww.allthingsbeautifulxo.com%2F2011%2F06%2Fjune-2011-birchbox.html

Oh Birchbox, you have outdone yourself. No knowledge of this beauty holy grail? See my overall explanation and review RIGHT HERE.

I tell myself every month, “I shall not sneak peek my box. I shall not watch other haul videos or read blogs that will ruin the surprise.” So of course, that never lasts. I am one of the last to get my box and I get quite impatient.  Obviously, I was psyched about this months box after seeing others receive the full-size Laura Geller product. & I am no less happy now that I have received it.

Let the haul begin!!!


 So happy with
the items I recieved! Here is the breakdown:

ITEM-BRAND-AMOUNT IN SAMPLE-PRICE AND FULL-SIZE OF PRODUCT

1. Blow Up Daily Volumizing Shampoo-BLOW NY- 2FL OZ – $16 for 9 FL OZ
2. Twirl-KATE SPADE – .05 FL OZ -$65 for 1.75 FL OZ
3. Baked Blush N’ Brighten-LAURA GELLER-FULL SIZED SAMPLE- $29.50 for 0.32 OZ
4.Molecular Mist-SIRCUIT COSMECEUTICALS- 8 ML- $36 for 2 OZ
5. Stripper to Go Nail Lacquer Removers-DEBORAH LIPPMANN- 2 Mitts- $12 for 10 Mitts

Impressions: I love the Blush, which I feel is more of a bronzer. Nice shimmer, love that it is full sized, and I have been wanting to try it for the past few months. Shampoo has kind of a fresh and herbal scent. The bottle is good quality, will travel well. The nail polish mitts will be lovely to travel with too. Twirl by Kate Spade is tiny. I wish it were larger so I could try layering it with other scents, on its own, its not for me. They make it seem like its going to be fruity, which I love, but it doesn’t to me. NOTE: This could be my skin chemistry. Last, the Molecular Mist. I have been wanting to try a product like this so I’m so happy it was included. It is actually a decent size, smells nice and herbal, but not too strong. I think I will be loving it this summer. I might even buy a full size!

Overall: Very happy. You can’t beat the price. $10 for the box, when the Blush N’ Brighten in Honey Dipped alone is about $30. Very satisfied.

Filed Under: Fragrance, Hair, Nails

  • « Previous Page
  • 1
  • …
  • 132
  • 133
  • 134
  • 135
  • Next Page »
Meet Stephanie Louise Telford- the blogger behind All Things Beautiful XO & Home in High Heels
Email Twitter Facebook Instagram Google Plus +
Pinterest Bloglovin Youtube tumblr RSS Feed

Recent Posts

  • Gifts to Snag for Happy Moments Right Now
  • Zoya Luscious Part B Collection Swatches & Review
  • Zoya Luscious Part A Collection Swatches & Review
  • Pixi by Petra Collagen Lip Gloss Review & Lip Swatch
  • Arise Jasmine Perfume Oil Roll-On from A Girl’s Gotta Spa! is my Purse Fragrance
  • Eye Looks featuring Urban Decay Wired Pressed Pigment Palette & Eyeliners – Two Options!
  • Urban Decay Wired Pressed Pigment Palette Review, Swatches, & Eye Looks
  • Urban Decay WIRED 24/7 Glide-On Eye Pencils in Jolt, Amped, Shock, & Vivid Swatches & Review
  • Stila Blue Realm Velvet Eye Shadow Palette Swatches & Review
  • Showing Off Pixi’s #20YearsOfGlow including my Favorites!

Popular

  • Best Drugstore Anti-Aging Hydrating Moisturizer in the Olay Regenerist Micro-Sculpting Cream on All Things Beautiful XO Best Drugstore Anti-Aging Hydrating Moisturizer
  • Sephora Supreme Cleansing Oil Review & How I Use It!
  • New L’Oreal Infallible Shade in Blinged & Brilliant Dupe Alert & Comparisons!
  • Wavy Ombre Teal Mermaid Hair Check out the best hair products to get the most fabulous beachy waves, treat, & style them on All Things Beautiful XO 6 Hair Products to Get the PERFECT Summer Beachy Waves & Styles
  • Swatches & Review of the Zoya Luscious Part A Collection - shades in Wanda, Patrice, Teresa, Andrea, Bentley, and Sharon on All Things Beautiful XO Zoya Luscious Part A Collection Swatches & Review
  • DIY at Home Hair Dye Tips & Tricks + Twisted Headband Styling Tutorial with Schwarzkopf got2b® Metallics Smoky Violet & got2be® hair products on All Things Beautiful XO DIY at Home Hair Dye Tips & Tricks + Twisted Headband Styling Tutorial with Schwarzkopf got2b® Metallics Smoky Violet 
  • Zoya Summer: Beach & Surf by Zoya Nail Polish

Categories:

Post History

Tweets by @StephLouiseATB
This error message is only visible to WordPress admins

Error: No connected account.

Please go to the Instagram Feed settings page to connect an account.


This blog at times uses affiliate links, sponsored material, & receives some products as samples in hopes of review. This in no way alters the articles/posts written & all opinions are my own or that of a guest writer. Please see my disclosure tab above header for more info.

Copyright © 2026 · Web Hosting By RFE Hosting